Freelance Electronics Components Distributor
Closed Dec 25th-26th
800-300-1968
We Stock Hard to Find Parts

C1925

Part # C1925
Description BLOCK, JUNCTION - Bulk
Category HARDWARE
Availability In Stock
Qty 2
Qty Price
1 + $24.92401
Manufacturer Available Qty
MAGNUM
  • Shipping Freelance Stock: 2
    Ships Immediately


Technical Document


DISCLAIMER: The information provided herein is solely for informational purposes. Customers must be aware of the suitability of this product for their application, and consider that variable factors such as Manufacturer, Product Category, Date Codes, Pictures and Descriptions may differ from available inventory.

Hardware Description
AVR STK500 User Guide 3-3
1925C–AVR–3/03
3.3 Connection of
LEDs and
Switches
Figure 3-4. Connection of LEDs and Switches to I/O Port Headers
Any I/O port of the AVR can be connected to the LEDs and switches using the 10-wire
cables. The headers are supplied with VTG (target V
CC
) and GND lines in addition to the
signal lines.
3.4 Port Connectors The pinout for the I/O port headers is explained in Figure 3-5. The square marking indi-
cates pin 1.
Figure 3-5. General Pinout of I/O Port Headers
The PORTE/AUX header has some special signals and functions in addition to the
PORTE pins. The pinout of this header is shown in Figure 3-6.
Px1
Px3
Px5
Px7
VTG
Px0
Px2
Px4
Px6
GND
1 2
PORTx
Hardware Description
3-4 AVR STK500 User Guide
1925C–AVR–3/03
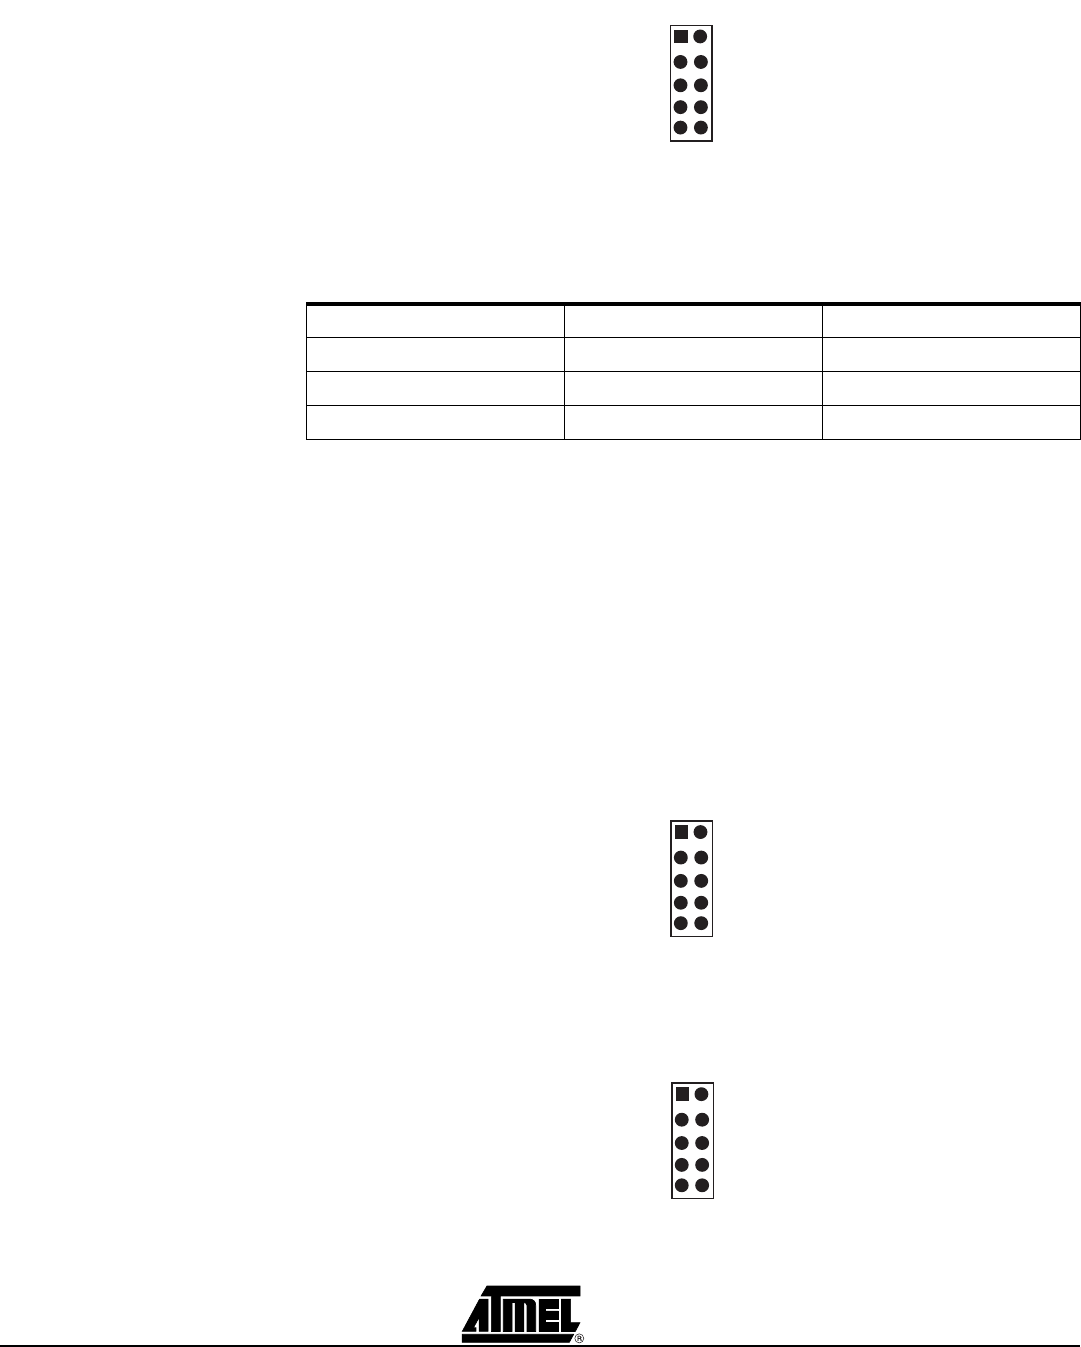
Figure 3-6. Pinout of PORTE Header
The special functions of this port are:
n PE0 - PE2:
n REF: Analog reference voltage. This pin is connected to the AREF pin on devices
having a separate analog reference pin.
n XT1: XTAL 1 pin. The internal main clock signal to all sockets. If the XTAL1 jumper is
disconnected, this pin can be used as external clock signal.
n XT2: XTAL 2 pin. If the XTAL1 jumper is disconnected, this pin can be used for
external crystal with the XT1 pin.
The headers for the LEDs and switches use the same pinout as the I/O port headers.
The pinout of the switch header is explained in Figure 3-7 and the pinout for the LED
header is explained in Figure 3-8. The square marking indicates pin 1.
Figure 3-7. Pinout of the Switch Header
Figure 3-8. Pinout of the LED Header
Table 3-1. PORTE Connection
ATmega161 AT90S4414/AT90S8515
PE0 PE0/ICP/INT2 ICP
PE1 PE1/ALE ALE
PE2 PE2/OC1B OC1B
PE1
RST
GND
XT2
VTG
PE0
PE2
REF
XT1
GND
1 2
PORTE/AUX
SW1
SW3
SW5
SW7
VTG
SW0
SW2
SW4
SW6
GND
1 2
SWITCHES
LED1
LED3
LED5
LED7
VTG
LED0
LED2
LED4
LED6
GND
1 2
LEDS
Hardware Description
AVR STK500 User Guide 3-5
1925C–AVR–3/03
3.5 Description of
User RS-232
Interface
The STK500 includes two RS-232 ports. One RS-232 port is used for communicating
with AVR Studio. The other RS-232 can be used for communicating between the target
AVR microcontroller in the socket and a PC serial port connected to the RS-232. To use
the RS-232, the UART pins of the AVR need to be physically connected to the RS-232.
The 2-pin header marked “RS232 SPARE” can be used for connecting the RS-232 con-
verter to the UART pins on the target AVR microcontroller in the socket. Use the 2-wire
cable to connect the UART pins to the RS-232. The connection is shown in Figure 3-9.
The block schematic of the RS-232 connection is shown in Figure 3-10.
Figure 3-9. Connection of I/O Pins to UART
Figure 3-10. Schematic of UART Pin Connections
TXD
RXD
Voltage
Converter
VTG 5V
MAX202CSE
470R
470R
1n2
1n2
2
3
5V
RS-232
PREVIOUS1234567891011NEXT